I coax a man named Mike into Challenging me.
He brings Death guard, a throwback list from 4th edition.
He has...
A daemon Prince (mark of Nurgle, Wings, Warptime)
A land Raider
3 Plague Marine squads
2 Rhinos
a Havoc squad with Mark of Nurgle
a 4-man Terminator Squad
10 summoned lesser daemons.
We play a Dawn of War Capture and Control (Capture the Draw)
I did not write a formal battle report for this. So it will be kind of loose.
He advanced everything except a squad of Plague marines that he kept around his objective.
I manage to stop a Rhino early and he got his daemons in turn 2, before they were in my lines.
I had trouble stopping the land raider (as I always do).
I managed to kill the Daemon prince, Land Raider (late in the game), the daemons, and both Rhinos got Immobilized, and I killed 2 Plague Marine squads.
The game ended in a draw because of my inability to be able to effectively assault his Objective with my lasgun toting guardsmen. I had a heavy bolter squad nearby, but they were ineffective against Plague Marine armor.
The game lasted 7 full turns. It ended in a 1-1 draw, as "Capture the Draw usually does"
No challenge token for me.
These games bring me to 34W 14L 16D in fifth edition.
-Mike
Tuesday, August 4, 2009

Challenge Board, Game 4.
I find a person to challenge me.
It is Thomas! He brings Space Marines.
We play a Capture and Control (Capture the Draw as I call it) Spearhead.
*Again, my apologies for no pictures.
I set up and go first.
I deploy in a defensive formation with my objective a little inwards in my deployment zone.
He deploys 2 Las/Plas Razorbacks with 5 Space Marines each in the far corner of his deployment zone. Everything else he says is in reserves.
Turn 1:
Me: I shake a razorback. Everything else runs forward.
Thomas: nothing.
Turn 2:
Me: I destroy a Razorback, killing 2 Marines in the process. I shake the other Razorback. My other units continue running.
Thomas: I learn that everything else in Thomas List will be outflanking. He gets in 2 10-man assault squads, 2 razorbacks with 5 marines each, Tigurius and Khan in on turn 2, despite me having an officer of the fleet...Everything but one assault squad arrives on my table edge.
The oncoming Razors tank shock one of my plasma squads off of the table. The heavy bolters kill a lascannon team. The assault squad mauls a unit. The other assault squad advances from thomas' table edge towards my guys in the center of the table.
Turn 3:
Me: My meltaguns manage to kill all the Razorbacks. I kill 4 marines from one squad, 2 from another, I also do two wounds to Khan. Through Shooting and Assault I kill the 10-man assault squad. I also manage to gun down 5 members from the far assault squad.
Thomas: The rest of thomas' reserves (10-man assault, razorback with 5 guys) outflanks on my side. The razorback squad disembarks and kills 5 guys from one of my units. The heavy bolter from the razor kills 2 guys from my Melta command squad. Tigurius' psychic powers kill my master of the fleet and cause a wound to kell and a wound to my commander.
The 10-man assault squad bolt pistols the flamer squad, who run off of the board.
In the assault phase kahn, tigurius and the far assault squad kill 2 complete infantry squads.
Turn 4:
Me: Through immense shooting and all my orders tests being passed, I manage to kill everything in my deployment zone, save the razorback and 5-man tactical squad.
The rest of my units run towards thomas' very far objective.
Thomas: The Razorback Heavy bolters 3 guys from my command squad to death. The assault squad charges a 10-man vox squad and kills all of them.
Turn 5:
Me: I destroy the far razorback, there are no casualties to the passengers. I kill the Assault squad. I kill the 5-man tactical squad. I immoblize and shake the Rhino.
Thomas: Thomas moves his 7 remaining tactical marines to the rear of his objective, still within scoring range.
The die of destiny is rolled. The game ends. My closest units to his objective are about 2 inches too far to contest. Thomas has 8 models left on the board. I have well over 70.
A 1-1 Draw. Thomas does not lose his challenge token. I do not gain one.
-Mike
It is Thomas! He brings Space Marines.
We play a Capture and Control (Capture the Draw as I call it) Spearhead.
*Again, my apologies for no pictures.
I set up and go first.
I deploy in a defensive formation with my objective a little inwards in my deployment zone.
He deploys 2 Las/Plas Razorbacks with 5 Space Marines each in the far corner of his deployment zone. Everything else he says is in reserves.
Turn 1:
Me: I shake a razorback. Everything else runs forward.
Thomas: nothing.
Turn 2:
Me: I destroy a Razorback, killing 2 Marines in the process. I shake the other Razorback. My other units continue running.
Thomas: I learn that everything else in Thomas List will be outflanking. He gets in 2 10-man assault squads, 2 razorbacks with 5 marines each, Tigurius and Khan in on turn 2, despite me having an officer of the fleet...Everything but one assault squad arrives on my table edge.
The oncoming Razors tank shock one of my plasma squads off of the table. The heavy bolters kill a lascannon team. The assault squad mauls a unit. The other assault squad advances from thomas' table edge towards my guys in the center of the table.
Turn 3:
Me: My meltaguns manage to kill all the Razorbacks. I kill 4 marines from one squad, 2 from another, I also do two wounds to Khan. Through Shooting and Assault I kill the 10-man assault squad. I also manage to gun down 5 members from the far assault squad.
Thomas: The rest of thomas' reserves (10-man assault, razorback with 5 guys) outflanks on my side. The razorback squad disembarks and kills 5 guys from one of my units. The heavy bolter from the razor kills 2 guys from my Melta command squad. Tigurius' psychic powers kill my master of the fleet and cause a wound to kell and a wound to my commander.
The 10-man assault squad bolt pistols the flamer squad, who run off of the board.
In the assault phase kahn, tigurius and the far assault squad kill 2 complete infantry squads.
Turn 4:
Me: Through immense shooting and all my orders tests being passed, I manage to kill everything in my deployment zone, save the razorback and 5-man tactical squad.
The rest of my units run towards thomas' very far objective.
Thomas: The Razorback Heavy bolters 3 guys from my command squad to death. The assault squad charges a 10-man vox squad and kills all of them.
Turn 5:
Me: I destroy the far razorback, there are no casualties to the passengers. I kill the Assault squad. I kill the 5-man tactical squad. I immoblize and shake the Rhino.
Thomas: Thomas moves his 7 remaining tactical marines to the rear of his objective, still within scoring range.
The die of destiny is rolled. The game ends. My closest units to his objective are about 2 inches too far to contest. Thomas has 8 models left on the board. I have well over 70.
A 1-1 Draw. Thomas does not lose his challenge token. I do not gain one.
-Mike
Challenge Board, Game 3.
I am currently on Tier 2 of the Challenge Board.
With my newly acquired "Challenge Token" I challenge Dameon (Who I believe is the past winner) to a game.
*I apologize that there are no pictures.
We play a Seize Ground (5 Objectives) Pitched battle.
I choose to Deploy first. I choose to go First.
Dameon brings...
2 Tzeentch Daemon Princes (Gift, Warptime?, Wings)
2 Squads of 10 Chaos Space Marines w/Missile in a Rhino w/Havoc Launcher
3 Close Combat Dreadnoughts
3 Defilers
I bring the AIIG.
Turn 1:
Me: Through copious firepower, I immobilize both Rhinos and manage to Kill a Dreadnought.
I do one wound to a Daemon Prince and take the Havoc missile off of a rhino.
Everyone else runs forward towards one of 5 objectives.
Dameon: A battle cannon shell kills a Junior Officer, a Standard and a regular joe from a command squad. Battle cannons also kill 5 from a melta squad, 1 conscript, and 6 from a plasma squad.
Turn 2:
Me: I immobilize a defiler, I do one wound to the Blue daemon prince and 2 wounds to the other... Not a great round.
Dameon: Uses gift to turn a meltagun trooper into a chaos spawn. Battle Cannons kill... 2 guard from the command squad, 2 lascannon teams, one guardsman from a flamer squad.
In the ensing assault phase I lose the conscripts and 2 other squads...I cause no wounds in return.
Turn 3:
Me: I manage to kill another Dreadnought and blast the last wound off of a Daemon Prince. I assault the other daemon prince with 17 guys, I cause zero wounds and all 17 die.
Dameon: Turns 2 Missile Launcher teams into Chaos Spawn...
The Battle Cannons kill one missile team and one heavy bolter team.
In assault the Daemon Prince kills a ten man squad, the chaos spawns kill the rest of the missile squad. The dreadnought kills 4 guys, but I pass the break test (to my dismay)
Turn 4:
Me:A lone Plasma Gunner destroys a Defiler! My missile team breaks off the board.
Three lasguns from the mortar squad kill the daemon prince.
Dameon: 20 Chaos Marines dismount and run towards objectives.
At this point in the game, I stopped taking notes as I really needed to pay attention.
Basically, it boiled down to my command squad assaulting a dreadnought and managing to immobilize it with my 2 powerfists before the entire squad died in a few turns of combat.
I did not inflict any more significant casualties in the game. I was really struggling to kill armor in the later turns. The game ended in a draw with me having 2 models capturing 2 different objectives. Dameons scoring units each had one as well.
This game ended in a draw, and resulted in me losing my challenge token. So now I need to wait for someone to challenge me so that I can win one back. I need a token to challenge another player.
-Mike
With my newly acquired "Challenge Token" I challenge Dameon (Who I believe is the past winner) to a game.
*I apologize that there are no pictures.
We play a Seize Ground (5 Objectives) Pitched battle.
I choose to Deploy first. I choose to go First.
Dameon brings...
2 Tzeentch Daemon Princes (Gift, Warptime?, Wings)
2 Squads of 10 Chaos Space Marines w/Missile in a Rhino w/Havoc Launcher
3 Close Combat Dreadnoughts
3 Defilers
I bring the AIIG.
Turn 1:
Me: Through copious firepower, I immobilize both Rhinos and manage to Kill a Dreadnought.
I do one wound to a Daemon Prince and take the Havoc missile off of a rhino.
Everyone else runs forward towards one of 5 objectives.
Dameon: A battle cannon shell kills a Junior Officer, a Standard and a regular joe from a command squad. Battle cannons also kill 5 from a melta squad, 1 conscript, and 6 from a plasma squad.
Turn 2:
Me: I immobilize a defiler, I do one wound to the Blue daemon prince and 2 wounds to the other... Not a great round.
Dameon: Uses gift to turn a meltagun trooper into a chaos spawn. Battle Cannons kill... 2 guard from the command squad, 2 lascannon teams, one guardsman from a flamer squad.
In the ensing assault phase I lose the conscripts and 2 other squads...I cause no wounds in return.
Turn 3:
Me: I manage to kill another Dreadnought and blast the last wound off of a Daemon Prince. I assault the other daemon prince with 17 guys, I cause zero wounds and all 17 die.
Dameon: Turns 2 Missile Launcher teams into Chaos Spawn...
The Battle Cannons kill one missile team and one heavy bolter team.
In assault the Daemon Prince kills a ten man squad, the chaos spawns kill the rest of the missile squad. The dreadnought kills 4 guys, but I pass the break test (to my dismay)
Turn 4:
Me:A lone Plasma Gunner destroys a Defiler! My missile team breaks off the board.
Three lasguns from the mortar squad kill the daemon prince.
Dameon: 20 Chaos Marines dismount and run towards objectives.
At this point in the game, I stopped taking notes as I really needed to pay attention.
Basically, it boiled down to my command squad assaulting a dreadnought and managing to immobilize it with my 2 powerfists before the entire squad died in a few turns of combat.
I did not inflict any more significant casualties in the game. I was really struggling to kill armor in the later turns. The game ended in a draw with me having 2 models capturing 2 different objectives. Dameons scoring units each had one as well.
This game ended in a draw, and resulted in me losing my challenge token. So now I need to wait for someone to challenge me so that I can win one back. I need a token to challenge another player.
-Mike
Friday, July 24, 2009
The rise of Melta Weapons
We are about a year out since the release of 5th edition for 40k.
In the many games that I have played I have noticed the trend; people love Melta Weapons.
I thought to myself, not unusual, it is certainly better than Plasma at killing Vehicles.
Then I began to see the Multi-Melta as the heavy weapon of choice among Tactical Squads and Dreadnoughts.
I thought I would investigate. I computed the chance for a certain strength weapon to Destroy (Wrecked or Exploded) a vehicle it was shot at, based on Armor Value.
This is what I came up with..
 I realize that the chart is a bit hard to read.
I will explain the trends that I found. Remember, the values represent a chance to destroy a vehicle, not just damage it.
First we see that the melta (outside of 1/2 range) dominates all other weapons at AV 10.
At AV 11-13 only Str 10 weapons perform better while the Melta performs better or equal to a Str 9 weapon (like a Lascannon). Only at AV 14 do Str 9 and 10 weapons outperform a melta weapon.
Obviously, when a melta weapon gets within 1/2 range, it eclipses other weapons (sometimes outperforming them by integer multiples) *Except in the case of Monoliths. When you add in Twin-linking (Vulkan) it just gets ridiculous. Aside from the Monolith, the chance to destroy a vehicle with a melta weapon within half its range is never less than 25% and rises to almost 50% on the lower end.
The worst part is, the lascannon costs more points then the Multi-Melta. When I play Blood Angels, I run 4 Lascannons in my tactical squads. It think that is about to change.
-Mike
In the many games that I have played I have noticed the trend; people love Melta Weapons.
I thought to myself, not unusual, it is certainly better than Plasma at killing Vehicles.
Then I began to see the Multi-Melta as the heavy weapon of choice among Tactical Squads and Dreadnoughts.
I thought I would investigate. I computed the chance for a certain strength weapon to Destroy (Wrecked or Exploded) a vehicle it was shot at, based on Armor Value.
This is what I came up with..
 I realize that the chart is a bit hard to read.
I will explain the trends that I found. Remember, the values represent a chance to destroy a vehicle, not just damage it.
First we see that the melta (outside of 1/2 range) dominates all other weapons at AV 10.
At AV 11-13 only Str 10 weapons perform better while the Melta performs better or equal to a Str 9 weapon (like a Lascannon). Only at AV 14 do Str 9 and 10 weapons outperform a melta weapon.
Obviously, when a melta weapon gets within 1/2 range, it eclipses other weapons (sometimes outperforming them by integer multiples) *Except in the case of Monoliths. When you add in Twin-linking (Vulkan) it just gets ridiculous. Aside from the Monolith, the chance to destroy a vehicle with a melta weapon within half its range is never less than 25% and rises to almost 50% on the lower end.
The worst part is, the lascannon costs more points then the Multi-Melta. When I play Blood Angels, I run 4 Lascannons in my tactical squads. It think that is about to change.
-Mike
Thursday, July 16, 2009
Challenge Board, Game 2.
I am now on the second tier and must defend my position.
My opponent is Justin and his Black Templars.
Captain (Marshall?) in Terminator Armor
Emperors Champion (preferred enemy vow)
Techmarine
7 Assault Terminators
9 Templars + Rhino (Emp champ rolls with)
9 Templars + Rhino (Techmarine rolls with)
Land Speeder w/Heavy Bolter, Assault Cannon
Vindicator
Dakka Pred (Auto, 2 HB's)
LRC (Termies and Termie Captain)
The Mission is a Secure and Control Pitched Battle (5 Objectives!)
*I forgot my camera this day, my Apologies.
I deploy first and go first.
Turn 1:
Me: Most of my Infantry Squads move forward to wards the countless objectives.
I destroy a Rhino w/ The Emperors Champion and friends.
I shake the LRC and the other Rhino.
Justin: Everything, save the non-destroyed Rhino moves forward. The LRC smokes.
The Vindicator and Land Speeder kill an entire Lascannon squad. The dakka pred kills a single base from another squad.
Turn 2:
Me: With copious firepower, I kill the Emperors champion and his entire squad. I manage to remove the assault cannon off of the Land Speeder.
Justin: The LRC tank shocks and breaks the conscripts. The LRC fires and kills an entire 10-man plasma squad. The Dakka pred kills another entire squad and teh land speeder takes 2 guys out of another squad.
Turn 3:
Me: I Immobilize and shake the land speeder. The rest of my force moves towards objective or fails at shooting Vehicles...On the bright side, my conscripts rally! (Due to an order)
Justin: The LRC kills an entire Infantry squad armed with one of my 4 meltaguns. The Vindicator kills 5 conscripts.
Turn 4:
Me: I manage to shake the predator, destroy the speeder (via powerfist) and degun the Hidden Rhino (parked near an objective)
Justin: The Rhino disembarks the squad it held and kills an entire nearby flamer squad.
The LRC kills an entire Plasma wielding command squad.
Turn 5:
Me: I shake the predator again and manage to kill 2 Templars (who fail their morale test and fall back from the objective (about 2 inches from the board edge).
Justin: The broken squad rallies and moves back up to the objective.
The Terminators finally disembark from the LRC and kill 2 entire 10 man infantry squads that were sitting on an objective. They take no casualties in return.
Turn 6:
Me: My heavy weapon shots ring true and I manage to Destroy the Vindicator. I also manage to kill about 2 Templars. They run 2 inches forward. I leave the termies alone, I do not want them getting an extra move.
Justin: With various shooting he manages to kill a few guard, but most of them have "gone to ground" in cover near an objective.
The die of destiny ends the game. I have 2 objectives, Justin only has 1. The others are in contention.
A post game review.
This would be a tough game for anyone given my 20+ scoring units. Justin only brought 2.
The LRC was definitely the man of the match, it accounted for at least 35 casualties throughout the game. Justin used his LRC very well. Before he moved each turn, he asked me to point out where the Meltas were in my army, he would either then kill the squad, or go the opposite direction. Good play on his part. The only criticism I have is that he should have deployed his Terminators much earlier than turn 5. Forcing me to deal with 8 Terminators would have limited my ability to spread out on the table to ALL of the objectives. ( At one point I had a scoring unit on each objective, forcing him to dislodge me. With so few units it would prove difficult.)
A great game. With this I am 2-0 on the challenge board.
My overall record improves to 34W 14L 13D.
-Mike
My opponent is Justin and his Black Templars.
Captain (Marshall?) in Terminator Armor
Emperors Champion (preferred enemy vow)
Techmarine
7 Assault Terminators
9 Templars + Rhino (Emp champ rolls with)
9 Templars + Rhino (Techmarine rolls with)
Land Speeder w/Heavy Bolter, Assault Cannon
Vindicator
Dakka Pred (Auto, 2 HB's)
LRC (Termies and Termie Captain)
The Mission is a Secure and Control Pitched Battle (5 Objectives!)
*I forgot my camera this day, my Apologies.
I deploy first and go first.
Turn 1:
Me: Most of my Infantry Squads move forward to wards the countless objectives.
I destroy a Rhino w/ The Emperors Champion and friends.
I shake the LRC and the other Rhino.
Justin: Everything, save the non-destroyed Rhino moves forward. The LRC smokes.
The Vindicator and Land Speeder kill an entire Lascannon squad. The dakka pred kills a single base from another squad.
Turn 2:
Me: With copious firepower, I kill the Emperors champion and his entire squad. I manage to remove the assault cannon off of the Land Speeder.
Justin: The LRC tank shocks and breaks the conscripts. The LRC fires and kills an entire 10-man plasma squad. The Dakka pred kills another entire squad and teh land speeder takes 2 guys out of another squad.
Turn 3:
Me: I Immobilize and shake the land speeder. The rest of my force moves towards objective or fails at shooting Vehicles...On the bright side, my conscripts rally! (Due to an order)
Justin: The LRC kills an entire Infantry squad armed with one of my 4 meltaguns. The Vindicator kills 5 conscripts.
Turn 4:
Me: I manage to shake the predator, destroy the speeder (via powerfist) and degun the Hidden Rhino (parked near an objective)
Justin: The Rhino disembarks the squad it held and kills an entire nearby flamer squad.
The LRC kills an entire Plasma wielding command squad.
Turn 5:
Me: I shake the predator again and manage to kill 2 Templars (who fail their morale test and fall back from the objective (about 2 inches from the board edge).
Justin: The broken squad rallies and moves back up to the objective.
The Terminators finally disembark from the LRC and kill 2 entire 10 man infantry squads that were sitting on an objective. They take no casualties in return.
Turn 6:
Me: My heavy weapon shots ring true and I manage to Destroy the Vindicator. I also manage to kill about 2 Templars. They run 2 inches forward. I leave the termies alone, I do not want them getting an extra move.
Justin: With various shooting he manages to kill a few guard, but most of them have "gone to ground" in cover near an objective.
The die of destiny ends the game. I have 2 objectives, Justin only has 1. The others are in contention.
A post game review.
This would be a tough game for anyone given my 20+ scoring units. Justin only brought 2.
The LRC was definitely the man of the match, it accounted for at least 35 casualties throughout the game. Justin used his LRC very well. Before he moved each turn, he asked me to point out where the Meltas were in my army, he would either then kill the squad, or go the opposite direction. Good play on his part. The only criticism I have is that he should have deployed his Terminators much earlier than turn 5. Forcing me to deal with 8 Terminators would have limited my ability to spread out on the table to ALL of the objectives. ( At one point I had a scoring unit on each objective, forcing him to dislodge me. With so few units it would prove difficult.)
A great game. With this I am 2-0 on the challenge board.
My overall record improves to 34W 14L 13D.
-Mike
Tuesday, July 14, 2009
Challenge Board, Game 1.
Dreamwizards, a local gaming store holds a Challenge Board.
You must beat an opponent to move up a level.
Once you win a game at that level (defending your spot) you are issued a token to challenge someone on a higher level.
1750, I bring the AIIG.
This is my first game, at ground level.
Game: Capture and Control (often called "capture the draw"), Pitched battle.
My opponent: Pat Eibel, Sho-T himself. He brings Tau.
Commander Plasma/Missile
3x 12 Warriors, Devilfish
12 warriors w/o Devilfish
a large (28) man Kroot unit
6 Pathfinders
2 Hammerheads with Rail Gun.
I deploy (in standard "across the board" fashion) and go first.
Pat Deploys in the rightmost corner of the Board. He deploys a unit of fire warriors on his objective.
Turn 1:
Me: Most everyone runs forward. I issue an order for my Lascannon team to destroy the Hammerhead in view. They comply.
I shake a Devilfish. I kill 3 Pathfinders and 2 Fire Warriors from the squad on the objective.
Pat: The Devilfish, Commander, and Hammerhead open up. They manage to kill 1 guardsmen from the Plasma Squad, 4 from a regular squad, and 3 from the Plasma Command Squad.

Turn 2:
Me: Through heavy weapons fire, I Immobilize the Front 2 Devilfish of his convoy. I kill one more Pathfinder and 2 Fire Warriors.
Pat: The Kroot arrive and outflank on my right flank. (NOT the side that has my objective)
The Fire Warriors in the Devilfish roll out. The Fire Warriors kill a flamer squad and a command squad. The Hammerhead ordnances 7 guys to death.
The kroot double charge a missile team and a 6-man remnant squad. Easily killing them.
They consolidate away from my gunline behind a hill for cover.

Turn 3:
Me: My heavy weapons Immobilize the last Devilfish and Stun the Hammerhead. The Mortas kill 10 Kroot and Pin them.
I manage to kill 9 Fire Warriors from one squad with awesome Frag Missile Shooting.
Pat: Pats Drones detach and his remaining Fire Warriors run towards his objective.

Turn 4:
Me: My heavy weapons continue their unrelenting fury as they de-gun the hammerhead and kill 8 of the 12 Fire Warriors running to the objective.
Those same fire warriors fail their pinning test.
My spare firepower kills the rest of the Kroot.
Pat: His drones and unpinned Fire Warriors kill2 from a 4-man unit and 3 from a seven man unit.

At this point with objectives firmly in my control, Pat concedes.
Some post game analysis, as I am pretty sure Pat will read this battle report.
Pat made 2 key errors, they were both deployment errors.
Pat deployed the majority of his force as far away from my objective as was physically possible.
I realize that he did this with the intent to shield his transports from my heavy weapons, but all it accomplished was to let my 4 heavy weapon teams (2 las, 2 missile) cause a jam in his mobility.
The second was to out flank the Kroot on the opposite side of the board as my objective. While I have no kind words for Kroot, they do beat guard in close combat.
With this I move up to the next tier. This puts me at 1-0-0 in the Challenge Board.
My overall (5th edition only) record is now 33W 14L 13D
-Mike
You must beat an opponent to move up a level.
Once you win a game at that level (defending your spot) you are issued a token to challenge someone on a higher level.
1750, I bring the AIIG.
This is my first game, at ground level.
Game: Capture and Control (often called "capture the draw"), Pitched battle.
My opponent: Pat Eibel, Sho-T himself. He brings Tau.
Commander Plasma/Missile
3x 12 Warriors, Devilfish
12 warriors w/o Devilfish
a large (28) man Kroot unit
6 Pathfinders
2 Hammerheads with Rail Gun.
I deploy (in standard "across the board" fashion) and go first.
Pat Deploys in the rightmost corner of the Board. He deploys a unit of fire warriors on his objective.
Turn 1:
Me: Most everyone runs forward. I issue an order for my Lascannon team to destroy the Hammerhead in view. They comply.
I shake a Devilfish. I kill 3 Pathfinders and 2 Fire Warriors from the squad on the objective.
Pat: The Devilfish, Commander, and Hammerhead open up. They manage to kill 1 guardsmen from the Plasma Squad, 4 from a regular squad, and 3 from the Plasma Command Squad.
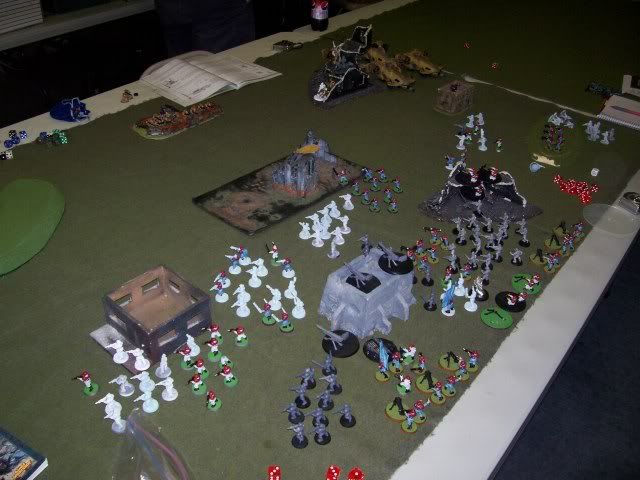
Turn 2:
Me: Through heavy weapons fire, I Immobilize the Front 2 Devilfish of his convoy. I kill one more Pathfinder and 2 Fire Warriors.
Pat: The Kroot arrive and outflank on my right flank. (NOT the side that has my objective)
The Fire Warriors in the Devilfish roll out. The Fire Warriors kill a flamer squad and a command squad. The Hammerhead ordnances 7 guys to death.
The kroot double charge a missile team and a 6-man remnant squad. Easily killing them.
They consolidate away from my gunline behind a hill for cover.
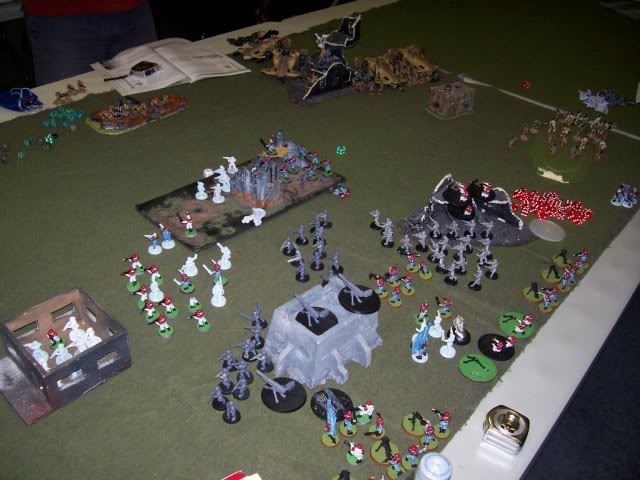
Turn 3:
Me: My heavy weapons Immobilize the last Devilfish and Stun the Hammerhead. The Mortas kill 10 Kroot and Pin them.
I manage to kill 9 Fire Warriors from one squad with awesome Frag Missile Shooting.
Pat: Pats Drones detach and his remaining Fire Warriors run towards his objective.
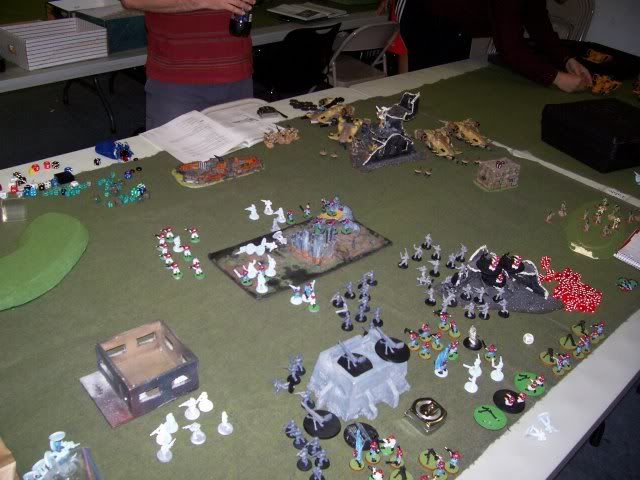
Turn 4:
Me: My heavy weapons continue their unrelenting fury as they de-gun the hammerhead and kill 8 of the 12 Fire Warriors running to the objective.
Those same fire warriors fail their pinning test.
My spare firepower kills the rest of the Kroot.
Pat: His drones and unpinned Fire Warriors kill2 from a 4-man unit and 3 from a seven man unit.
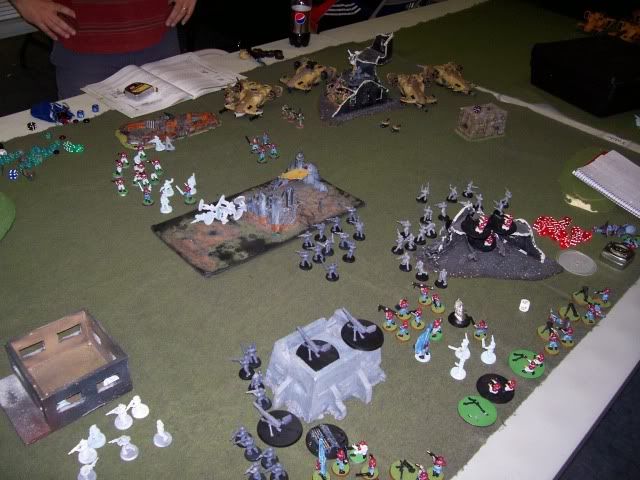
At this point with objectives firmly in my control, Pat concedes.
Some post game analysis, as I am pretty sure Pat will read this battle report.
Pat made 2 key errors, they were both deployment errors.
Pat deployed the majority of his force as far away from my objective as was physically possible.
I realize that he did this with the intent to shield his transports from my heavy weapons, but all it accomplished was to let my 4 heavy weapon teams (2 las, 2 missile) cause a jam in his mobility.
The second was to out flank the Kroot on the opposite side of the board as my objective. While I have no kind words for Kroot, they do beat guard in close combat.
With this I move up to the next tier. This puts me at 1-0-0 in the Challenge Board.
My overall (5th edition only) record is now 33W 14L 13D
-Mike
Return of the AIIG.
With the arrival of Codex: Imperial Guard, I break out the All-Infantry Imperial Guard (AIIG)
I am playing 1750 point games in order to practice for the Challenge Board.
HQ
Command Platoon
w/Kell, Power Fist, Bodyguard, Officer of the Fleet
Grey Knight Brother Captain
w/Psycannon, Psychic Hood
Troops
Platoon 1
Platoon Command w/2 Plasma Guns, Vox-Caster, Boltgun
Infantry Squad w/Meltagun
Infantry Squad w/Meltagun
Infantry Squad w/Vox Caster
Infantry Squad
Heavy Weapon Squad w/3 Heavy Bolters
Heavy Weapon Squad w/Mortars
Heavy Weapon Squad w/Mortars
Platoon 2
Platoon Command w/2 Meltaguns, Vox, Standard, Powerweapon, Bolt Pistol
Infantry Squad w/Plasma Gun
Infantry Squad w/Plasma Gun
Conscript Platoon
Heavy Weapon Squad w/3 Missile Launchers
Heavy Weapon Squad w/3 Missile Launchers
Heavy Weapon Squad w/3 Lascannons
Heavy Weapon Squad w/3 Lascannons
Platoon 3
Platoon Command w/Powerfist, 2 Flamers, Vox-Caster
Infantry Squad w/Flamer
Infantry Squad w/Flamer
Infantry Squad w/Vox Caster
Infantry Squad
Total 1750
Game 1: Spearhead Annihilation.
My opponent: Thomas and his mono-khorne Daemons.
Bloodthirster (upgrades)
Bloodthirster (upgrades)
20 Bloodletters
20 Bloodletters
20 Bloodletters
Khornate Daemon Prince
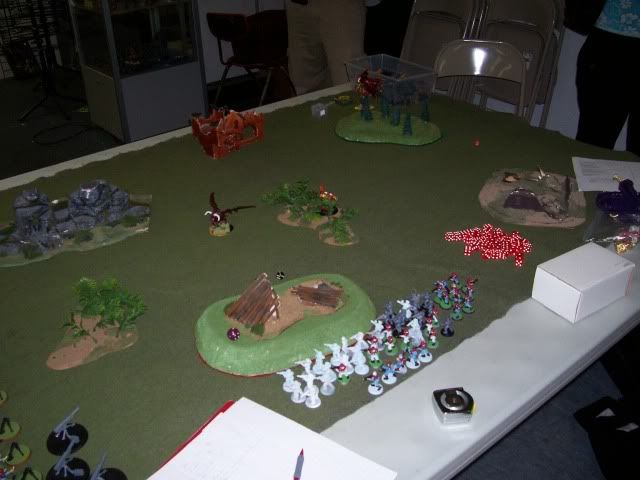
I defer the go first to Thomas. Neither of us deploy anything.
Turn 1:
Thomas: Deep strikes 2 Bloodthirsters and a khornate Daemon prince in or near my board quarter. They run.
Me: I chill.

Turn 2:
Thomas: No reserves arrive... The daemons walk/fly around, confused at lack of opponents.
Me: I get 2 Mortar squads, a lascannon squad, a missile squad, a squad of 40 combined guard, and the plasma command squad.
I use "first Rank Fire, Second Rank Fire" (FRFSRF) on a blooodthirster and send him back to the warp.

Turn 3:
Thomas: 1 Bloodletter squad arrives, everyone RUNS!
Me: I get a bunch more reserves, i forgot to list them. I kill all the bloodletters and the Daemon Prince.
I do 2 wounds to the bloodthirster.

Turn 4:
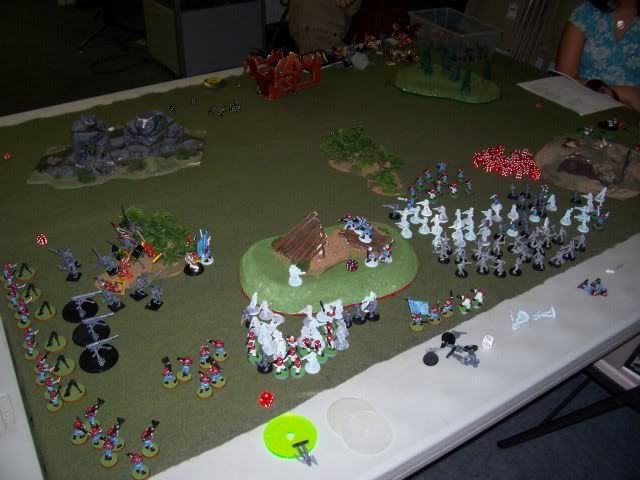
Thomas: 2 20-man Bloodletter units arrive. They run.
The Bloodthirster charges and kills 4 guardsmen, the 36 man unit remains in the fight,
Me: I fire and kill all but 1 Bloodletter out of 20, the other 20 is unharmed.
In assault, the guard beat down the Bloodthirster. (Yes, You read it right.)

Turn 5:
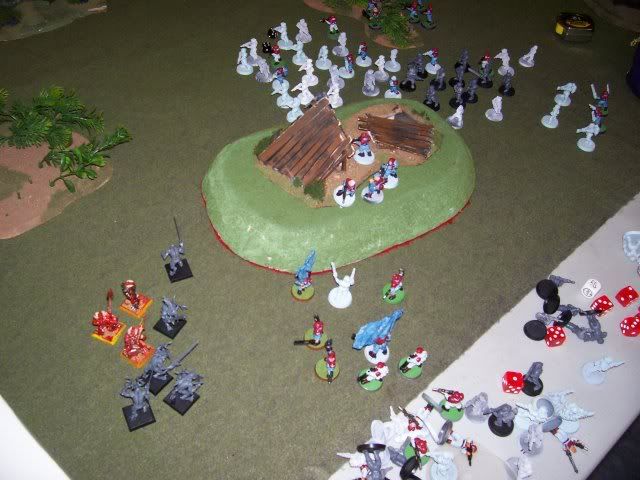
Thomas: Engages in a huge multi-assault that sees 5 entire units die. (mainly mortar, missile, and las teams)
the Daemons lose 12 from the 20 unit and the lone member perishes.
Me: I am out of range of the last 8 daemons on the board. Everything runs to meet them.

The die of destiny ends the game in a 5-5 draw. For the record there are only 8 Bloodletters left on the board and 8 is the number of Khorne.
I have well over 120 models left. This was an unlucky roll for the guard.
Game 2: Sieze Ground, Pitched battle
My Opponent: Mike and his Space Marines.
Shrike
5 Terminators TH/SS
3 10 man tacticals w/Multi-Melta, Meltagun, melta Bombs
3 Rhinos
2 10 Man assault squads w/Lightning Claws
Land Raider Redeemer
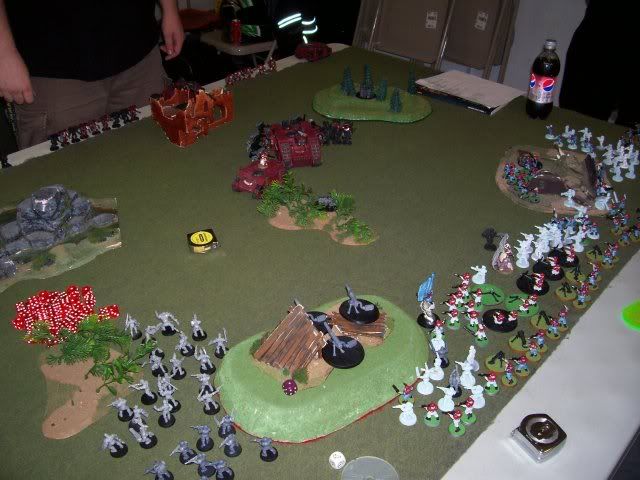
Mike Deploys and goes first.
After I deploy, he infiltrates Shrike and a 10-man Assault squad 18 inches away.
Turn 1:
Mike: Everything runs forward; All Vehicles pop smoke. Shrike and his unit jump 12, run 3 then assault. (they have fleet)
Shrike and his squad kill 2 10 man guard units, they lose zero.
Me: I use my orders to immobilize the Land Raider via Lascannons. I destroy a rhino with Krak Missiles. Various other shooting kills 9 men from shrikes unit.

Turn 2:
Mike: LRR uses its Assault Cannon to kill a lascannon team. Shrike and friend double assault a missile and Heavy bolter team. Some die.
Me: I degun the LRR's assault cannon. I Kill 5 assault marines and 1 Terminator.
The command squad charges and wipes Shrike and friend, they lose 4 however.

Turn 3:
Mike: His lone Rhino from reserves arrives. The Terminatros fleet, assault and kill 3 guard. But lose 2 in the process.
The Assault squad charges and kills 4 guardsmen, but lose 3 in the fighting. Both of my units break.
Me: I blow up a Rhino, kill the remaining Assault squad members.
The Terminators kill 3 guardsmen in close combat.

Turn 4:
Mike: The conscripts get boltgunned and lose 7 of their number. The terminators kill 4 guard, who break.
Me: 3 Frag missiles kill 6 Space Marines.

Turn 5:
Mike: He kills 3 guard, who break and runs a unit to the center objective.
Me: I kill all Marines on the Objective. I Destroy a Rhino.

Mike Concedes as I have 2 objectives. He has 1.
These 2 games bring my record to 32W 14L 13 D.
-Mike
I am playing 1750 point games in order to practice for the Challenge Board.
HQ
Command Platoon
w/Kell, Power Fist, Bodyguard, Officer of the Fleet
Grey Knight Brother Captain
w/Psycannon, Psychic Hood
Troops
Platoon 1
Platoon Command w/2 Plasma Guns, Vox-Caster, Boltgun
Infantry Squad w/Meltagun
Infantry Squad w/Meltagun
Infantry Squad w/Vox Caster
Infantry Squad
Heavy Weapon Squad w/3 Heavy Bolters
Heavy Weapon Squad w/Mortars
Heavy Weapon Squad w/Mortars
Platoon 2
Platoon Command w/2 Meltaguns, Vox, Standard, Powerweapon, Bolt Pistol
Infantry Squad w/Plasma Gun
Infantry Squad w/Plasma Gun
Conscript Platoon
Heavy Weapon Squad w/3 Missile Launchers
Heavy Weapon Squad w/3 Missile Launchers
Heavy Weapon Squad w/3 Lascannons
Heavy Weapon Squad w/3 Lascannons
Platoon 3
Platoon Command w/Powerfist, 2 Flamers, Vox-Caster
Infantry Squad w/Flamer
Infantry Squad w/Flamer
Infantry Squad w/Vox Caster
Infantry Squad
Total 1750
Game 1: Spearhead Annihilation.
My opponent: Thomas and his mono-khorne Daemons.
Bloodthirster (upgrades)
Bloodthirster (upgrades)
20 Bloodletters
20 Bloodletters
20 Bloodletters
Khornate Daemon Prince
I defer the go first to Thomas. Neither of us deploy anything.
Turn 1:
Thomas: Deep strikes 2 Bloodthirsters and a khornate Daemon prince in or near my board quarter. They run.
Me: I chill.

Turn 2:
Thomas: No reserves arrive... The daemons walk/fly around, confused at lack of opponents.
Me: I get 2 Mortar squads, a lascannon squad, a missile squad, a squad of 40 combined guard, and the plasma command squad.
I use "first Rank Fire, Second Rank Fire" (FRFSRF) on a blooodthirster and send him back to the warp.
Turn 3:
Thomas: 1 Bloodletter squad arrives, everyone RUNS!
Me: I get a bunch more reserves, i forgot to list them. I kill all the bloodletters and the Daemon Prince.
I do 2 wounds to the bloodthirster.

Turn 4:
Thomas: 2 20-man Bloodletter units arrive. They run.
The Bloodthirster charges and kills 4 guardsmen, the 36 man unit remains in the fight,
Me: I fire and kill all but 1 Bloodletter out of 20, the other 20 is unharmed.
In assault, the guard beat down the Bloodthirster. (Yes, You read it right.)
Turn 5:
Thomas: Engages in a huge multi-assault that sees 5 entire units die. (mainly mortar, missile, and las teams)
the Daemons lose 12 from the 20 unit and the lone member perishes.
Me: I am out of range of the last 8 daemons on the board. Everything runs to meet them.
The die of destiny ends the game in a 5-5 draw. For the record there are only 8 Bloodletters left on the board and 8 is the number of Khorne.
I have well over 120 models left. This was an unlucky roll for the guard.
Game 2: Sieze Ground, Pitched battle
My Opponent: Mike and his Space Marines.
Shrike
5 Terminators TH/SS
3 10 man tacticals w/Multi-Melta, Meltagun, melta Bombs
3 Rhinos
2 10 Man assault squads w/Lightning Claws
Land Raider Redeemer
Mike Deploys and goes first.
After I deploy, he infiltrates Shrike and a 10-man Assault squad 18 inches away.
Turn 1:
Mike: Everything runs forward; All Vehicles pop smoke. Shrike and his unit jump 12, run 3 then assault. (they have fleet)
Shrike and his squad kill 2 10 man guard units, they lose zero.
Me: I use my orders to immobilize the Land Raider via Lascannons. I destroy a rhino with Krak Missiles. Various other shooting kills 9 men from shrikes unit.
Turn 2:
Mike: LRR uses its Assault Cannon to kill a lascannon team. Shrike and friend double assault a missile and Heavy bolter team. Some die.
Me: I degun the LRR's assault cannon. I Kill 5 assault marines and 1 Terminator.
The command squad charges and wipes Shrike and friend, they lose 4 however.
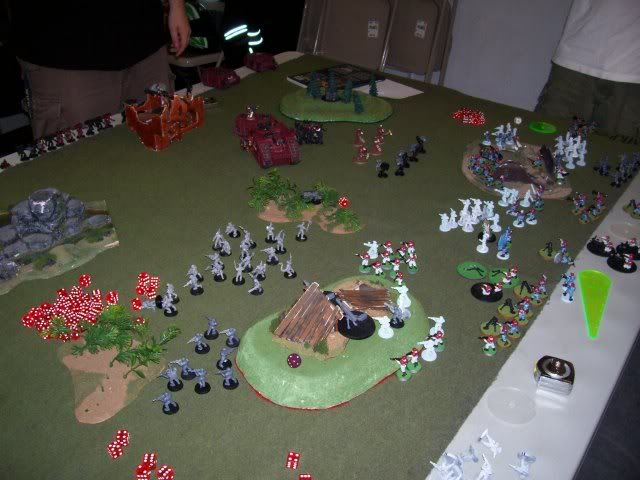
Turn 3:
Mike: His lone Rhino from reserves arrives. The Terminatros fleet, assault and kill 3 guard. But lose 2 in the process.
The Assault squad charges and kills 4 guardsmen, but lose 3 in the fighting. Both of my units break.
Me: I blow up a Rhino, kill the remaining Assault squad members.
The Terminators kill 3 guardsmen in close combat.
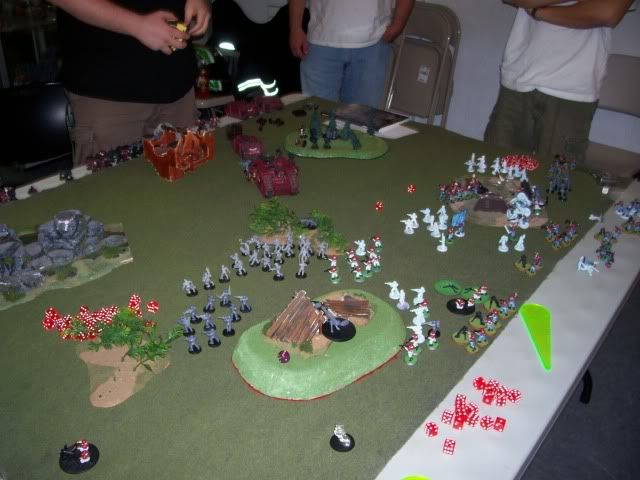
Turn 4:
Mike: The conscripts get boltgunned and lose 7 of their number. The terminators kill 4 guard, who break.
Me: 3 Frag missiles kill 6 Space Marines.
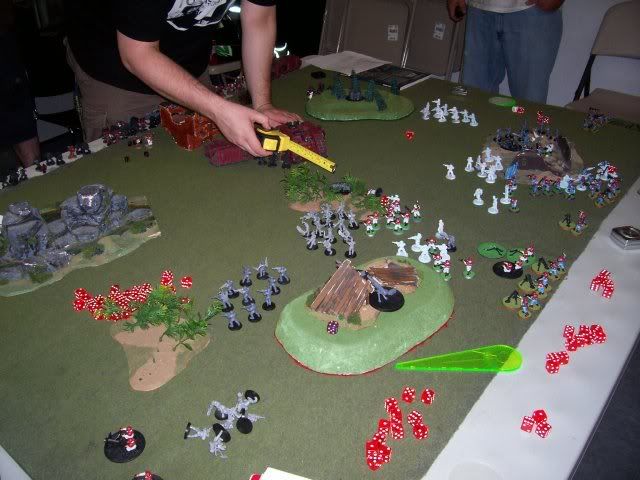
Turn 5:
Mike: He kills 3 guard, who break and runs a unit to the center objective.
Me: I kill all Marines on the Objective. I Destroy a Rhino.
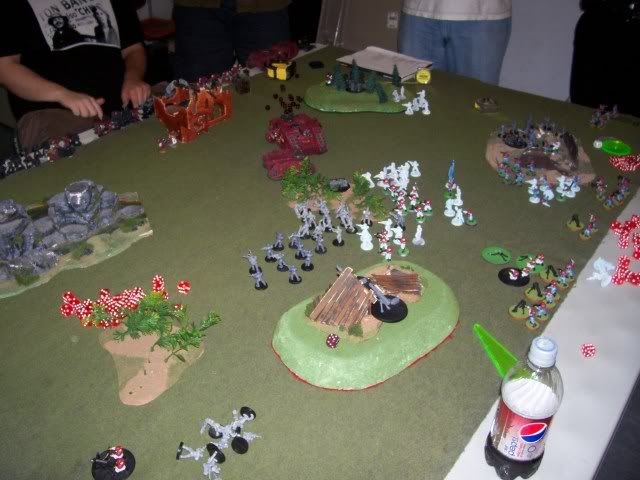
Mike Concedes as I have 2 objectives. He has 1.
These 2 games bring my record to 32W 14L 13 D.
-Mike
Subscribe to:
Posts (Atom)